How to Paint Flat Pack Furniture

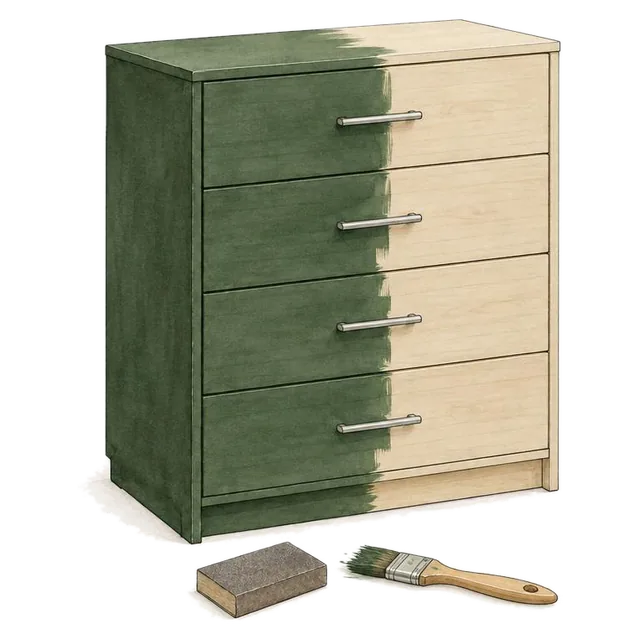
Everything you need to paint flat pack and melamine furniture properly — cleaning, keying the plastic surface and thin coats of self-priming Flat Pack paint.

Most flat pack furniture is made from melamine-faced chipboard — a smooth, non-porous plastic-coated surface that paint struggles to adhere to without the right preparation. With correct preparation and our dedicated Flat Pack paint it can be done successfully, and the results are very effective. Almost every failure on melamine comes down to one thing: not sanding enough.

At a glance

  1. The three rules
    • Don’t take the carcass apart.
    • Sand to create a key.
    • Keep coats thin.
  2. Step by step

    9 clear steps, start to finish.

  3. Questions

    14 common questions, answered.

The three rules

Rule one

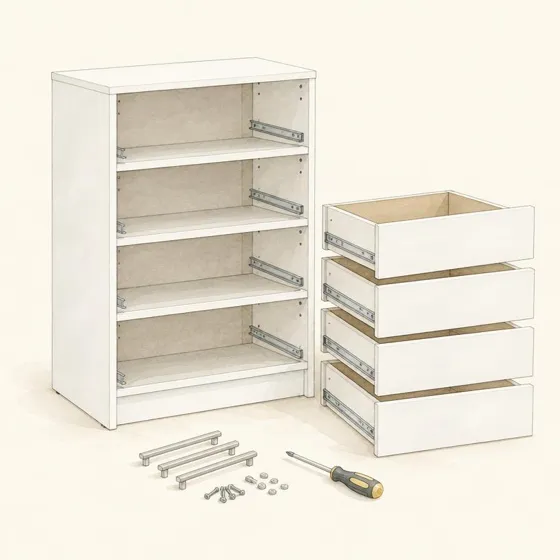
Don’t take the carcass apart

Cam locks and chipboard joints are effectively single-use.

Paint flat pack furniture assembled. Remove drawers, doors and handles, but leave the main carcass together.

Taking it apart and rebuilding it can loosen the joints for good.

Rule two

Sand to create a key

The single most important step in the whole process.

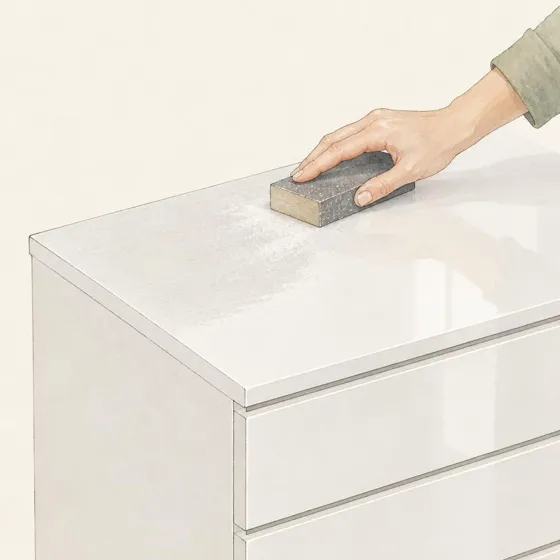
Melamine and laminate are smooth and shiny, so paint has very little to hold on to. Clean thoroughly, then sand every surface until the shine is gone.

Remove all the sanding dust afterwards: dust left between the key and the paint undoes the sanding.

Rule three

Keep every coat thin

Thick coats cannot cure properly over inert melamine.

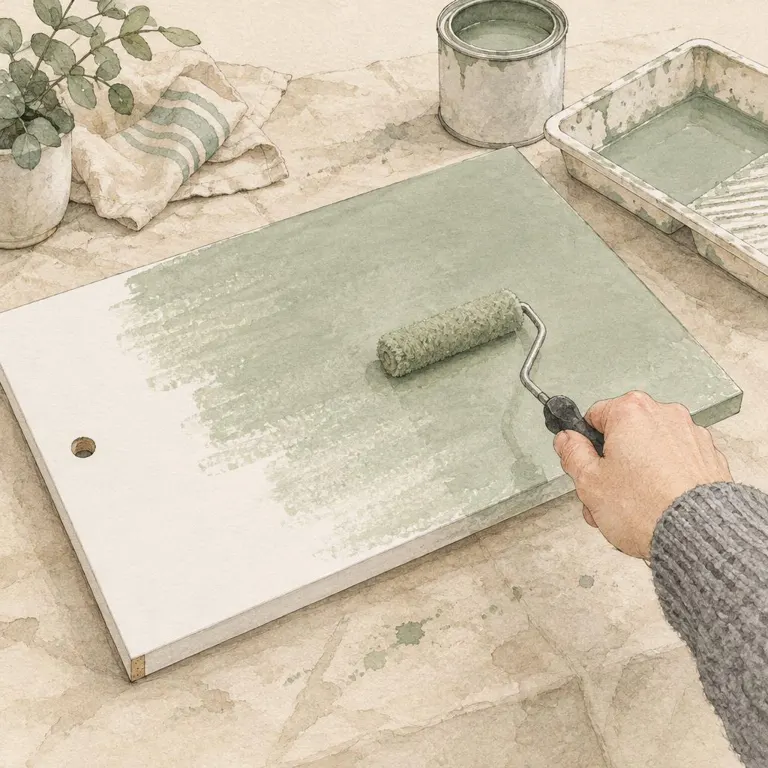
Melamine absorbs nothing, so a heavy coat sits on the surface and stays soft underneath. Apply thin, even coats with a lint-free, mohair-style roller, thinning the paint very slightly with water if it drags.

Thin coats may mean a third coat for full coverage. That is normal, and far tougher than two thick ones. Before each recoat, wait out the recommended recoat time of 1–2 hours — longer if conditions are cool or damp — then tap the dry paint very lightly with a fingernail, gently enough not to dent the film. It should sound firm and hard, not soft like a pencil rubber.

What you'll need

The paint

In the Toolkit for Painting Flat-Pack Furniture

Before You Start

  1. 🧩 Flat pack furniture is generally not designed to be disassembled and reassembled.
  2. 🔩 Remove drawers, shelves, doors and handles — and nothing beyond that.
  3. ⚠️ Taking the carcass apart risks damaging the chipboard joints and cam lock fastenings, which are typically single-use.
  4. 🚚 Move the piece to a garage or workspace where possible for better light and access.
  5. 📦 If it cannot be moved, protect surrounding walls and floors with plastic sheeting or cardboard drop cloths before you start.

🏷️ Bag and label the fittings you do remove — flat pack screws are rarely interchangeable.

🛏️ Paint drawer fronts and doors flat on a bench for the smoothest result.

Products used:Dust Sheet
  1. 🎯 Masking tape must be removed while the paint is still wet, or left until the paint is completely dry.
  2. ⚠️ Never remove tape from paint that is partially cured — the curing film will tear and deform, leaving a ragged edge that is very difficult to repair.
  3. 🧱 This matters even more on melamine, where adhesion is already more demanding than on wood.
  4. 📐 Press tape edges down firmly so nothing bleeds underneath.
  5. 🔪 If the film has built up, score along the tape edge with a sharp blade before pulling.

⏱️ When in doubt, leave the tape on and come back once the paint is genuinely hard.

🎗️ Use a premium low-tack tape — cheap tape lifts freshly bonded paint off melamine.

Products used:Premium Painter's Tape

Preparation

  1. 🧼 Any trace of grease, dust, polish or residue will compromise adhesion, so cleanliness before sanding is critical.
  2. 🧴 Clean the entire surface with a sugar soap solution and a soft cloth.
  3. 🔍 Work the solution into all edges and joins, not just the obvious flat faces.
  4. 💧 Rinse thoroughly with a clean wet microfibre cloth.
  5. ⏳ Allow the surface to dry completely before you start sanding.

🍽️ Pay extra attention to kitchen and bedroom pieces — polish and hand grease build up invisibly over years.

🧻 Use microfibre specifically; other cloths shed lint onto the surface.

Products used:Sugar Soap ConcentrateMicrofibre Cloths (Pack of 3)
  1. 🪚 Melamine is a smooth, non-porous plastic surface — paint has nothing to grip without sanding. Do not skip or reduce this step.
  2. 📏 Sand the entire surface firmly with 320 grit until it is uniformly dull, using a flat sanding block on flat faces to keep the abrasive even.
  3. 🧽 Use a sanding sponge on edges, profiles and routed sections, and paper folded to a point for tight corners.
  4. 👉 Unsanded melamine has a sheen — run your fingertips across it and they find grip because the surface is so smooth. Sheen means flat, and flat means paint will not stick.
  5. 👌 Correctly sanded melamine looks very matt and feels slightly floury and slippery — your fingertips glide across it. That is the microscopic architecture the paint keys into.

🔆 If any area still has a sheen after sanding, sand it again — every part must be uniformly matt before painting.

🎯 The goal is to scuff the surface, not to sand through the melamine into the chipboard beneath.

Products used:Sandpaper 320 GritFlat Sanding BlockSanding Sponge
  1. 🧻 Wipe the whole piece down with a clean damp microfibre cloth to lift every trace of sanding dust.
  2. 🔍 Work along edges, joins and internal corners where dust collects.
  3. 💨 Vacuum the workspace as well — airborne dust settles straight back onto a freshly sanded piece.
  4. ⏳ Allow the surface to dry fully before painting.
  5. 🖐️ Run a clean dry hand over the surface as a final check; it should feel matt and clean, not gritty.

🚪 Let the dust settle for a few minutes before wiping down rather than painting immediately after sanding.

🧼 Rinse the cloth often — a dusty cloth just moves the dust around.

Products used:Microfibre Cloths (Pack of 3)

Application

  1. 🎨 Our dedicated Flat Pack paint is self-priming on melamine — no separate primer is required, provided the surface has been correctly cleaned and sanded.
  2. ⚪ Matt — a restrained, low sheen.
  3. ✨ Satin — a smooth lustre. Both launch sheens are scrubbable and suitable for everyday use, so the choice is entirely aesthetic.

🫙 Sample first — a 60ml pot is enough for two coats on a test area of the piece itself.

🥄 Stir for 1–2 minutes before use so the colour and consistency are correct.

Products used:Flat Pack Paint
  1. 🪶 Keep every coat thin. Melamine is inert and absorbs nothing, so a thick coat cannot cure properly on it and stays soft underneath.
  2. 💧 The paint may need thinning slightly on melamine so it flows out into a thin, even film. Add a little clean water at a time and stir well; stop as soon as it rolls on smoothly.
  3. 🎢 Use a lint-free, mohair-style short pile roller on flat faces, and a good quality synthetic brush for edges, joins and anywhere the roller cannot reach.
  4. 🪵 Exposed chipboard edges are more porous than the melamine face and will absorb more paint — apply these with a brush for better control.
  5. ⏰ Allow 1–2 hours between coats.
  6. 🫰 Check it is ready before recoating: wait out the recommended recoat time first — 1–2 hours, longer if conditions are cool or damp — then tap the dried coat very lightly with a fingernail, gently enough not to dent the film. It should feel and sound firm and hard. If it feels soft and sounds dull, a bit like tapping a pencil rubber, give it longer.
  7. 🔁 Thin coats may need a third coat for full, even coverage. That is normal and gives a far tougher finish than two heavy coats.

🪚 Denibbing lightly with 320 grit between the first and second coats gives the smoothest result; before a third it is beneficial but not compulsory.

🧻 Always wipe down with a damp microfibre cloth after any sanding before recoating.

Products used:Synthetic Brush SetMohair Mini RollerFlat Pack Paint

Curing and Longevity

  1. 🌙 Leave all removable components — drawers, doors, shelves — out for at least overnight after the final coat before reinstalling.
  2. ⏳ Allow the full 7 day cure period before the piece is subjected to everyday use.
  3. 📦 Handle the piece carefully during the cure period and avoid knocking corners for the first 7 days.
  4. 🧽 After curing, clean with a slightly damp microfibre cloth only — no abrasive pads or chemical cleaners.
  5. 🔩 Refit handles once the paint is genuinely hard rather than merely touch dry.

📦 Keep the leftover paint sealed for touch-ups; stir thoroughly before using it.

  1. 📋 Painted flat pack furniture will not be as durable as painted solid wood.
  2. 🧱 The chipboard substrate and melamine surface place limits on how deeply the paint can bond.
  3. ✅ With correct preparation and our Flat Pack paint the finish will be durable and long-lasting for normal everyday use.
  4. 💥 Edges and corners remain more susceptible to chipping than on solid wood.
  5. 🖌️ Keep a little paint back — small chips on edges touch in easily and invisibly with a fine brush.

🎨 Darker colours show edge chips less than very pale ones on chipboard-cored pieces.

🛠️ Preparation is everything. The paint is the easy part.

The paint

Self-Priming
Highly Durable
Waterbased
Ultra-low VOC
Touch dry30 mins
Recoat time1–2 hours
Full adhesion7 days
Key and denib with320 grit
Brush withSynthetic
Roll withMohair mini

Can you paint flat pack furniture?

Yes. Most flat pack furniture is melamine-faced chipboard — a smooth, non-porous plastic-coated surface that paint struggles to adhere to without the right preparation. With correct cleaning, thorough sanding and our dedicated Flat Pack paint, it can be done successfully and the results are very effective.

What paint should I use on melamine furniture?

Our Flat Pack paint. It is self-priming on melamine surfaces — no separate primer is required, provided the surface has been correctly cleaned and sanded. It is available across all 180 colours in matt and satin. Both launch sheens are scrubbable and suitable for everyday use; the only difference is the level of sheen.

Do I need to sand melamine before painting?

Yes — this is the single most important step in the whole process. Melamine is a smooth, non-porous plastic surface and paint has nothing to grip without sanding. Sand the entire surface firmly with 320 grit until it is uniformly dull. Use a flat sanding block on flat faces and a sanding sponge on edges and profiles.

How do I know if I have sanded melamine enough?

Use your fingertips. Unsanded melamine has a sheen, and your fingertips find grip on it because the surface is so smooth and uniform that your skin catches. Sheen means flat, and flat means paint will not stick. Correctly sanded melamine looks very matt and feels slightly floury and slippery — your fingertips glide across it. The fine sanding has disrupted the uniform smoothness, creating a microscopic architecture for the paint to key into. If any area still has a sheen, sand it again.

Do I need a primer on flat pack furniture?

No. Our Flat Pack paint is self-priming on melamine, provided the surface has been cleaned with sugar soap and sanded until uniformly matt. Preparation is what makes the difference here, not primer.

Should I take flat pack furniture apart before painting?

No. Flat pack furniture is generally not designed to be disassembled and reassembled. Remove drawers, shelves, doors and handles, and nothing beyond that. Taking the carcass apart risks damaging the chipboard joints and cam lock fastenings, which are typically single-use.

How do I clean flat pack furniture before painting?

Melamine repels everything — including paint — so cleanliness before sanding is critical. Any trace of grease, dust, polish or residue will compromise adhesion. Clean the entire surface with a sugar soap solution and a soft cloth, working it into all edges and joins. Rinse thoroughly with a clean wet microfibre cloth and allow to dry completely before sanding.

What tools should I use on flat pack furniture?

Use a lint-free, mohair-style short pile roller on flat faces for a smooth, even finish, and a good quality synthetic brush for edges, joins and anywhere the roller cannot reach. Keep every coat thin — melamine absorbs nothing, so thick coats cannot cure properly on it. Exposed chipboard edges are more porous than the melamine face and absorb more paint — apply these with a brush rather than a roller for better control.

How many coats of paint does melamine need?

Two full coats, allowing 1–2 hours between coats. Take care on edges and vertical surfaces where drips and runs form — build coverage in thin, even coats rather than trying to cover in one pass.

Should I sand between coats on melamine?

Sanding lightly with 320 grit between the first and second coats is ideal and gives the smoothest result. Between the second and third coats it is beneficial but not compulsory. Always wipe down with a damp microfibre cloth after any sanding before recoating.

How durable is painted flat pack furniture?

Painted flat pack furniture will not be as durable as painted solid wood. The chipboard substrate and melamine surface place limits on how deeply the paint can bond. With correct preparation and our Flat Pack paint the finish will be durable and long-lasting for normal everyday use, but edges and corners are more susceptible to chipping than on solid wood.

How long before I can use the furniture?

Leave all removable components — drawers, doors, shelves — out for at least overnight after the final coat before reinstalling. Allow the full 7 day cure period before the piece is subjected to everyday use. Handle it carefully during that period and avoid knocking corners.

When should I remove masking tape on melamine?

While the paint is still wet, or once it is completely dry — never in between. Removing tape from partially cured paint tears and deforms the curing film, leaving a ragged edge that is very difficult to repair. This is particularly important on melamine, where adhesion is already more demanding than on wood.

Can I paint melamine kitchen units the same way?

The preparation is identical — sugar soap, rinse, and sand with 320 grit until uniformly matt. For kitchen cabinet doors and frames we recommend our Kitchen Cabinet paint rather than Flat Pack paint, as it is formulated for the grease, moisture and heavy handling a kitchen sees. See our guide on how to paint kitchen cabinets.