How to Paint Furniture

Everything you need to paint wooden and MDF furniture properly — identifying the existing finish, dealing with wax and varnish, preparing MDF and two full coats of self-priming Furniture paint.

Painting furniture is one of the most rewarding decorating projects you can do — a tired, dated or second-hand piece becomes something that looks entirely new. This guide covers both wooden and MDF furniture, whether you are starting from bare timber or repainting an existing finish. The paint is the easy part; almost everything that determines the result happens before the tin is opened.

At a glance

  1. The three rules
    • Know what’s on the wood.
    • Remove tape wet or fully dry.
    • Two thin coats, hidden areas first.
  2. Step by step

    12 clear steps, start to finish.

  3. Questions

    15 common questions, answered.

The three rules

Rule one

Know the existing finish before you start

The preparation depends entirely on what’s already there.

Varnish and lacquer need keying and a test patch before you commit. Wax and oil finishes must be removed properly, because paint and wax do not bond.

Look closely and test a hidden area if you are unsure what the piece has been finished with.

Rule two

Follow the masking tape rule

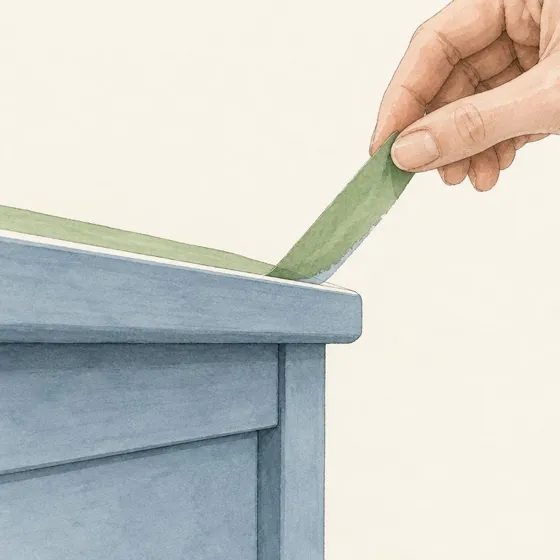
Remove tape while the paint is wet, or once it’s fully dry; never in between.

Peeling tape while the paint is part-dry tears the edge of the paint film with it.

Either pull it straight after the final coat, or wait until the paint has fully dried and score the edge lightly first.

Rule three

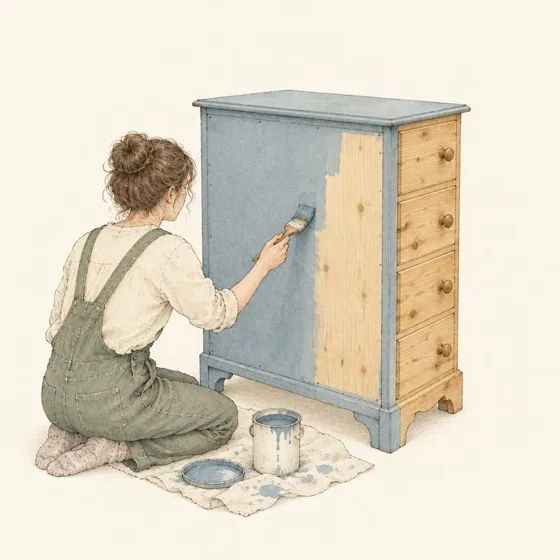
Apply two thin, even coats

Start with the least visible areas.

Thin, even coats give a better, tougher finish than one heavy coat. Start on the backs and insides, so your technique is settled by the time you reach the front. Denib lightly with 320 grit between coats.

Leave it overnight before reinstalling, and allow the full cure before heavy use.

What you'll need

The paint

In the Toolkit for Painting Furniture

Not in the toolkit

Before You Start

  1. 🚚 Wherever possible, move the furniture to a garage, utility room or outdoor space in good weather.
  2. 💡 Working away from the room gives you far better access, better light and far less to protect.
  3. 🛋️ Painting in situ means managing overspray, drips and dust in a space you live in.
  4. 📦 If the piece genuinely cannot be moved, protect the surrounding walls and floor thoroughly with plastic sheeting or cardboard drop cloths before you start.
  5. 🌡️ Whichever space you use, make sure it is dry, dust-free and reasonably warm — cold, damp air slows drying and spoils the finish.

🔦 Set up a work light to one side of the piece — raking light shows missed areas and runs far better than overhead light.

🪵 Raise the piece onto blocks or trestles so you can paint the lower edges without kneeling.

Products used:Dust Sheet
  1. 🔩 Remove all drawers, shelves, doors and handles before painting.
  2. 🧩 These are best painted separately and reinstalled once fully cured.
  3. 🚫 Do not disassemble further than this — furniture joints are not designed to be repeatedly taken apart and reassembled.
  4. 🏷️ Label drawers and doors and bag the screws so everything goes back where it came from.
  5. 🩹 Fill any redundant handle holes now if you are changing the hardware, and sand flush once dry.

📸 Photograph the piece before you take anything off — it saves guesswork at reassembly.

🖌️ Paint drawer fronts flat on a bench rather than vertically; you will get a far smoother finish with no runs.

  1. 🎯 Masking tape applied during painting must be removed while the paint is still wet, or left until the paint is completely dry.
  2. ⚠️ Never remove tape from paint that is partially cured — the curing film will tear and deform.
  3. 🪒 A torn tape edge leaves a ragged line that is very difficult to repair without sanding back and recoating.
  4. 📐 Press tape edges down firmly before painting so nothing bleeds underneath.
  5. 🔁 This rule applies to every painted surface, not just furniture.

⏱️ If you are unsure whether the paint is wet or curing, leave the tape and come back once it is genuinely hard.

🔪 Score along the tape edge with a sharp blade before pulling if the film has already built up.

Products used:Premium Painter's Tape

Wooden Furniture

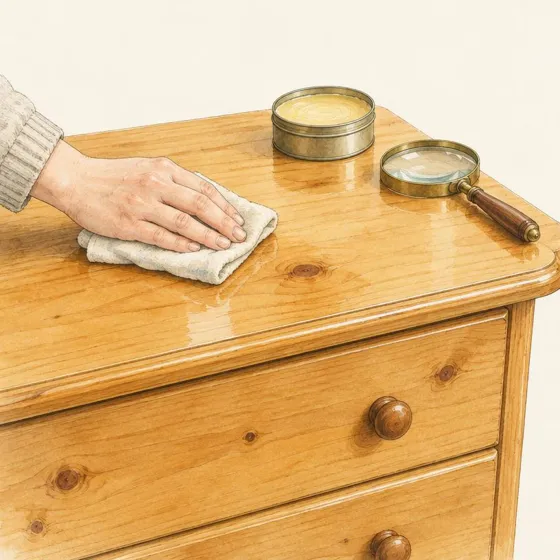
  1. 🔍 Before doing anything else, work out what you are dealing with — paint, varnish, lacquer, wax, oil or bare timber.
  2. 🎨 Previously painted and sound: sand the whole surface with 320 grit, clean with sugar soap, rinse with a clean wet microfibre cloth and allow to dry fully.
  3. 🩹 Previously painted and failing: sand back flaking or peeling areas to remove loose material, feather the edges so there is no hard line between old and new, then sand the whole surface with 320 grit and clean as above.
  4. 🪵 Bare or stripped timber: no separate primer is needed, but the first coat will raise the grain — let it dry fully, sand lightly with 320 grit and wipe down before the next coat.
  5. 🧴 Wax or oil: these need dedicated treatment before any paint goes near them — see the wax and oil steps below.

💧 A drop of water on bare timber tells you a lot — if it beads rather than soaks in, there is wax, oil or a sealer present.

🌾 Open-grained or thirsty timber may need an extra coat to look even.

Products used:Sugar Soap ConcentrateSandpaper 320 GritMicrofibre Cloths (Pack of 3)
  1. 🪚 If the varnish or lacquer is intact and in reasonable condition, sand the whole surface thoroughly with 320 grit to break through the sheen and create a key.
  2. 🧪 Always apply a test patch in an inconspicuous area before committing to the whole piece, and leave it overnight — at least 12 hours.
  3. 👀 Look for imperfections: cratering, fish eyes (small circular hollows) and pickling (a wrinkled or puckered surface).
  4. 💅 Test adhesion by dragging a fingernail or coin lightly across the dried patch — if the paint delaminates or lifts, the existing finish is incompatible without further prep or an isolating primer.
  5. 🧹 If the varnish is flaking or heavily built up, remove it — chemically with a varnish stripper and scraper, or physically with abrasives (an electric sander makes larger pieces far more manageable). Test patch again once stripped.

🔆 Sand until the whole surface is uniformly dull — any remaining sheen is a spot where paint will not grip.

😷 Wear a mask and work in ventilation when sanding old finishes; some contain materials you do not want to breathe.

Products used:Sandpaper 320 GritSanding SpongeIsolating Primer
  1. 🚫 Wax creates a non-absorbent barrier that prevents adhesion, and it penetrates deep into the grain — as the trade saying goes, once you wax you cannot go back. Oil behaves the same way.
  2. 🧴 Full removal method: apply white spirit generously with a cloth and leave it for at least five minutes to break down the wax or oil.
  3. 🧽 Scrub firmly with 0000 grade fine wire wool in the direction of the grain. A significant amount of residue will emerge — this is normal. Wipe away with a clean cloth and repeat until no more residue appears, then allow 24 hours to dry.
  4. 🧼 Once dry, clean the whole surface with sugar soap, rinse with a clean wet microfibre cloth and dry again. Then paint a test patch, leave it overnight and check it with a fingernail. Only if it fails is an isolating primer needed to seal in remaining traces.
  5. 🪵 The shortcut: if you would rather not use white spirit, sand the entire surface thoroughly with 180–240 grit to abrade through the wax layer, wipe down with a damp microfibre and test patch. This works on lightly waxed pieces but is less reliable on heavily treated ones.

🧪 Never skip the test patch on waxed or oiled surfaces — discovering adhesion failure after painting a whole piece is a very time-consuming problem to fix.

🕐 Leave every test patch overnight before judging it; wax problems often only appear as the film cures.

Products used:Sugar Soap ConcentrateFine Wire Wool (0000 Grade)Microfibre Cloths (Pack of 3)Isolating Primer

MDF Furniture

  1. 🪚 Sand all surfaces — faces, edges and any routed or profiled sections — with 320 grit sandpaper.
  2. 📐 Every part of the surface needs to be keyed, not just the flat faces.
  3. 🧽 For routed or profiled edges use a sanding sponge; it flexes into the detail without flattening it.
  4. 📄 Paper-backed abrasive folded to a point will reach into tight corners and recesses.
  5. 🧻 Wipe down with a clean damp microfibre cloth once you have finished sanding.

🖐️ Run your hand over the whole piece before wiping down — your fingertips will find the areas you missed.

🌀 Sand in consistent directions on flat faces so any residual scratch pattern is uniform.

Products used:Sandpaper 320 GritSanding SpongeMicrofibre Cloths (Pack of 3)
  1. 📏 Paint is a liquid, and liquids cannot properly adhere to a sharp 90-degree corner — the film pulls away from the edge as it dries.
  2. 💥 That leaves a thin, vulnerable point that will chip with the first knock.
  3. 🪶 Before the first coat, lightly round off all sharp edges and corners with 120 grit sandpaper.
  4. 🎯 You are not creating a large radius — just enough to remove the hard corner and introduce a slight curve.
  5. ⚠️ Be careful and considered, particularly where the crisp edge is part of the design.

🧱 This small step significantly extends the durability of the finish on any MDF piece.

👐 Do it by hand rather than with a power sander — control matters more than speed here.

Products used:Sandpaper 120 Grit
  1. ✅ Our Furniture paint is self-priming on correctly prepared MDF, so a separate primer is not required. Your first coat does the sealing.
  2. 🪵 Bare MDF, particularly the edges, is far more porous than the faces and soaks up the first coat quickly, so the edges may need an extra coat to look as even as the faces.
  3. 🌾 The first coat will raise the MDF fibres. Let it dry fully, denib lightly with 320 grit and wipe down with a damp microfibre cloth before the next coat.
  4. ✨ If you want the very finest finish, you can apply a primer first to seal the edges, but it is entirely optional.

🪚 Denibbing with 320 grit between the first and second coats is ideal on MDF; before a third coat it is beneficial but not compulsory.

🧻 Always wipe down with a damp microfibre cloth after any sanding before recoating.

Products used:Sandpaper 320 GritMicrofibre Cloths (Pack of 3)

Application

  1. 🎨 We recommend our Furniture paint for all furniture projects — it is available across all 180 colours in the palette.
  2. ⚪ Matt — a restrained, low sheen.
  3. ✨ Satin — a smooth lustre. Both launch sheens are scrubbable and suitable for furniture in everyday use, so the choice is entirely aesthetic.

🫙 Order a 60ml sample and paint two coats onto card before committing — furniture colour reads differently to a wall.

🥄 Stir the tin for 1–2 minutes before use; pigment settles in storage.

Products used:Furniture Paint
  1. 🖌️ Use a good quality synthetic brush for detail, mouldings, legs and anywhere a roller cannot reach.
  2. 🎢 Use a lint-free, mohair-style short pile roller on flat faces and large flat sections for the smoothest finish.
  3. 🔄 Apply two full coats, allowing 1–2 hours between coats.
  4. 🫰 Check it is ready before recoating: wait out the recommended recoat time first — 1–2 hours, longer if conditions are cool or damp — then tap the dried coat very lightly with a fingernail, gently enough not to dent the film. It should feel and sound firm and hard. If it feels soft and sounds dull, a bit like tapping a pencil rubber, give it longer.
  5. 🪶 Denib between coats: rub the dry coat very lightly with 320 grit to knock back raised grain and dust nibs, then wipe down with a damp microfibre cloth.
  6. 🙈 Work from the least visible areas first — underneath, the back, the insides — before moving to the most visible faces.
  7. 💧 Take care to avoid drips and runs on vertical surfaces; build coverage in thin, even coats rather than trying to cover in one pass.

🧵 Synthetic bristles hold their shape in water-based paint; natural bristles swell and drag.

🪶 Lay off each section with light, unloaded brush strokes in one direction to remove texture.

Products used:Synthetic Brush SetMohair Mini RollerFurniture Paint
  1. 🌙 Leave all removable components — drawers, doors, shelves — out for at least overnight after the final coat before reinstalling.
  2. 🔩 Refit handles and hardware only once the paint is genuinely hard, not just touch dry.
  3. ⏳ Allow the full 7 day cure period before the piece is subjected to everyday use.
  4. 🚫 Avoid placing heavy objects, cloths or plant pots on painted surfaces during the cure period.
  5. 🧽 After curing, a slightly damp microfibre cloth is all the piece will ever need — avoid abrasive pads and chemical cleaners.

🧴 Rub a candle stub or wax-free furniture slip on drawer runners rather than painting them — painted runners bind.

📦 Keep the leftover paint sealed and labelled; it is the only true colour match you will have for touch-ups.

The paint

Silky Finish
Highly Durable
Waterbased
Ultra-low VOC
Touch dry30 mins
Recoat time1–2 hours
Full adhesion7 days
Key and denib with320 grit
Brush withSynthetic
Roll withMohair mini

What paint should I use on wooden and MDF furniture?

Our Furniture paint is formulated for furniture in everyday use and is available across all 180 colours in matt and satin. Both launch sheens are scrubbable and equally durable — the only difference is the level of sheen, so the choice is entirely aesthetic.

Do I need to prime furniture before painting?

It depends on the surface. Previously painted furniture in sound condition does not need a primer — sand with 320 grit, clean with sugar soap, rinse and dry. Bare wood does not need a separate primer either, but the first coat will raise the grain, so sand lightly with 320 grit once dry and wipe down before the next coat. MDF does not need a primer either, because our Furniture paint is self-priming. The edges are far more porous than the faces, so they may need an extra coat, and you can prime first if you want the very finest finish. On waxed or oiled wood, remove the wax first, then paint a test patch. Only if it fails the fingernail test is an isolating primer needed.

How do I prepare MDF furniture for painting?

Sand every surface — faces, edges and any routed or profiled sections — with 320 grit. Use a sanding sponge on profiles so the detail is not flattened, and fold paper-backed abrasive to a point for tight corners. Lightly round off all sharp edges and corners with 120 grit before the first coat. Paint cannot adhere to a true 90-degree corner; the film pulls away as it dries, leaving a thin, vulnerable point that chips at the first knock. Our Furniture paint is self-priming, so your first coat does the sealing; a primer is optional for the very finest finish. Give the edges an extra coat if they still feel rough once dry, and denib lightly with 320 grit between coats, wiping down before each new coat.

Can I paint over varnished or lacquered furniture?

Yes, if the varnish is intact and in reasonable condition. Sand the whole surface thoroughly with 320 grit to break through the sheen and create a key. Always apply a test patch in an inconspicuous area first and leave it overnight — at least 12 hours. Look for cratering, fish eyes and pickling, and test adhesion by dragging a fingernail or coin lightly across the dried patch. If the paint lifts, the existing finish is incompatible without further preparation or an isolating primer. If the varnish is flaking or heavily built up, remove it with a stripper and scraper or with abrasives, then test patch again.

Can I paint furniture that has been waxed or oiled?

You can, but it requires proper removal first. Paint and wax do not bond — wax creates a non-absorbent barrier and penetrates deep into the grain. As the saying goes, once you wax you cannot go back. Oil behaves similarly. Full removal: apply white spirit generously, leave for five minutes, then scrub firmly with 0000 grade wire wool in the direction of the grain. Repeat until no more residue appears, allow 24 hours to dry, clean with sugar soap, rinse and dry, then apply an isolating primer. Never skip the test patch on a waxed or oiled piece.

Is there a shortcut for removing wax without white spirit?

Yes, with caveats. Sand the entire surface thoroughly with 180–240 grit to abrade through the wax or oil layer and create a key, then wipe down with a damp microfibre cloth and apply a test patch. This works reasonably well on lightly waxed or oiled surfaces but is less reliable on heavily treated pieces. Leave the test patch overnight and test adhesion with a fingernail or coin. If the paint lifts or shows imperfections, move to the full removal method.

Should I take the furniture apart before painting?

Remove all drawers, shelves, doors and handles — these are best painted separately and reinstalled once fully cured. Do not disassemble further than that. Furniture joints are not designed to be repeatedly taken apart and reassembled.

Where should I paint furniture?

Move the piece out of the room wherever possible — a garage, utility room or outdoor space in good weather gives you far better access, better light and much less to protect. Painting in situ means managing overspray, drips and dust in a space you live in. If the piece genuinely cannot be moved, protect the surrounding walls and floor thoroughly with plastic sheeting or cardboard drop cloths before you start.

What tools should I use to paint furniture?

Use a good quality synthetic brush for detail, mouldings, legs and anywhere a roller cannot reach. Use a lint-free, mohair-style short pile roller on flat faces and large flat sections for the smoothest finish. Synthetic bristles perform far better than natural bristles with water-based paint — natural bristles absorb water, swell and lose their shape.

How many coats does furniture need?

Two full coats, allowing 1–2 hours between coats. Bare timber and MDF may need an additional coat to look fully even, particularly on open-grained wood and on MDF edges. Work from the least visible areas first — underneath, the back, the insides — before moving to the most visible faces.

Should I sand between coats?

On MDF, sanding lightly with 320 grit between the first and second full coats is ideal. Between the second and third coats it is beneficial but not compulsory. On bare timber, sand after the first coat to flatten the raised grain. Always wipe down with a damp microfibre cloth after any sanding before recoating.

When can I put the drawers and doors back?

Leave all removable components — drawers, doors, shelves — out for at least overnight after the final coat before reinstalling. Allow the full 7 day cure period before the piece is subjected to everyday use.

When can I remove the masking tape?

Masking tape must be removed while the paint is still wet, or left until the paint is completely dry. Never remove tape from paint that is partially cured — the curing film will tear and deform, leaving a ragged edge that is very difficult to repair. This applies to all painted surfaces.

How do I clean painted furniture?

A slightly damp microfibre cloth is all that is needed for everyday marks, with soap and water for anything more stubborn. Avoid chemical cleaners, abrasive cloths and scouring pads. Wait until the full 7 day cure has passed before cleaning a newly painted piece.

Will my colour match if I order more paint later?

Not guaranteed. Paint is made using naturally occurring raw materials that vary slightly from one production batch to the next. Every tin within a single order is made from the same batch of base and the same batches of colourant. Order 10% more than you need and keep the surplus sealed for touch-ups.