How to Paint Trim and Woodwork

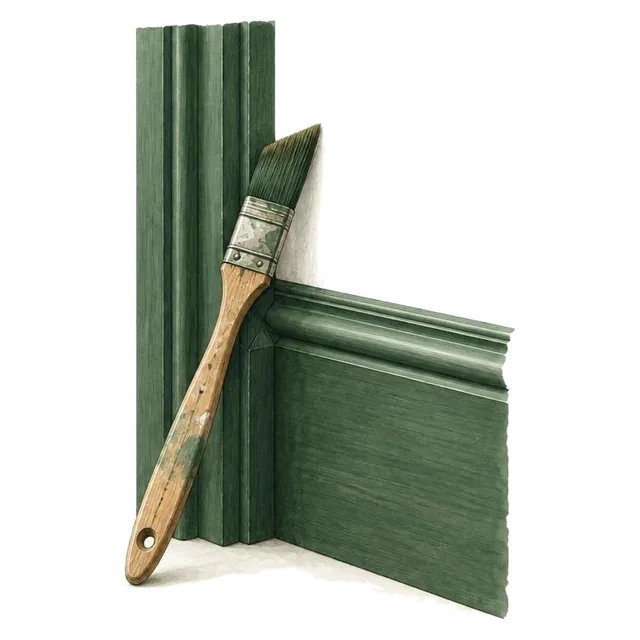
Everything you need to paint trim and woodwork properly — sanding, filling, caulking, masking and two full coats of Trim & Woodwork paint.

Fresh paint on skirting boards, door frames, window sills and bannisters can transform a space as dramatically as any wall colour. The key to getting it right is preparation, patience and using the right tools. Woodwork takes more punishment than walls — it gets knocked, touched, cleaned and leaned on constantly — so preparation matters more here than anywhere else, and finish choice matters too. This guide covers each surface in turn.

At a glance

  1. The three rules
    • Stir, never shake.
    • Key it until there’s no shine.
    • Caulk the wall joins.
  2. Step by step

    50 clear steps, start to finish.

  3. Questions

    28 common questions, answered.

The three rules

Rule one

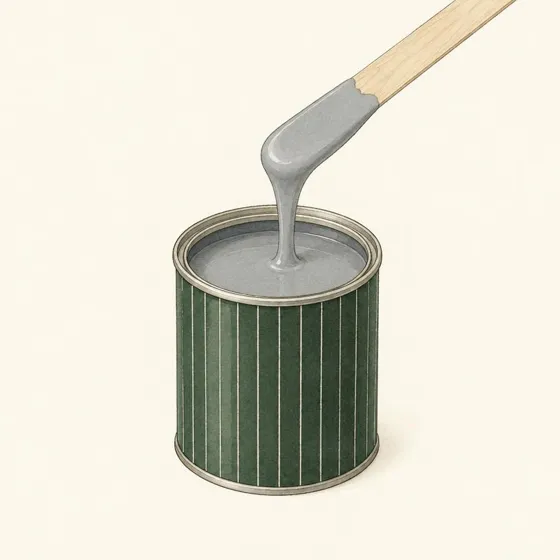
Stir the paint, never shake it

Settled pigment and matting agents cause patchy sheen.

Stir for one to two minutes with a drill and paddle on a slow speed, or two to three minutes by hand, working right to the bottom and around the edges of the tin.

Never shake a tin of water-based trim paint: it whips in air bubbles that leave pinholes in the dried paint. Stir again between coats.

Rule two

Key every surface until it’s evenly matt

Any shine left is a place the paint can lift from later.

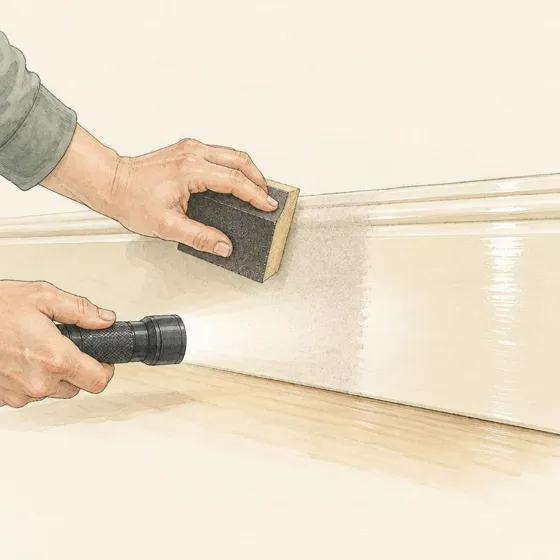
Sand with 320 grit in the direction of the grain, using a sanding sponge on mouldings. You are only dulling the old finish, not removing it.

When the surface looks evenly matt with no shiny patches, wipe away every trace of dust. A torch held flat to the surface shows the spots your eye misses.

Rule three

Caulk the wall joins, don’t fill them

Caulk stays flexible, so the line won’t crack.

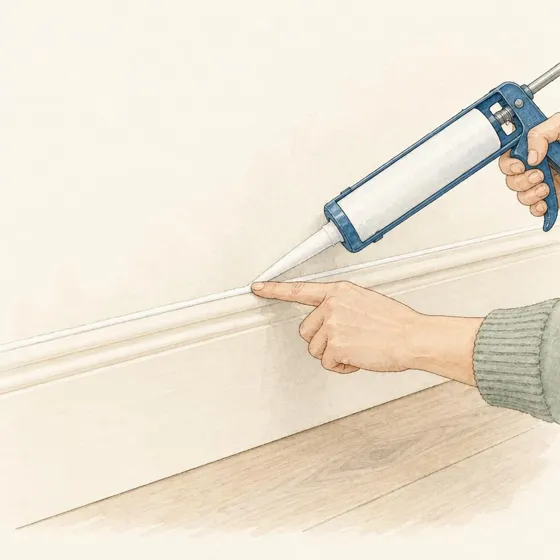
Run a thin bead of paintable caulk where the woodwork meets the wall, smooth it with a damp finger and wipe off the excess straight away.

Use filler for dents and holes, and caulk for joins. Only ever use caulk marked paintable: silicone sealant rejects paint completely.

What you'll need

The paint

In the Toolkit for Painting Trim & Woodwork

Not in the toolkit

Before You Start

  1. ✨ Satin gives specialist woodwork paint a smooth lustre that suits traditional and contemporary interiors.
  2. 🛡️ Use the specialist paint for the surface. Gloss is not in our launch range.
  3. 🕯️ Matt gives a soft, restrained look. Both launch woodwork finishes are Class 1 scrubbable.
  4. 🎨 Decide the finish before you buy, not after. Sheen changes how light reflects from the colour: Satin has more lustre than Matt.
  5. 🏠 Keep one finish running through a whole floor of the house wherever possible — mixed sheens on adjoining skirting and frames are very noticeable in daylight.

🧪 Order a sample and paint a spare offcut of timber, then hold it against the skirting at different times of day before committing.

⚖️ Higher sheen can make surface imperfections more noticeable. Fill and sand carefully, particularly for Satin.

Products used:Trim & Woodwork Paint
  1. 🪵 120 grit — coarse. Use it only for removing old, failing or heavily built-up paint, and for levelling ridges and runs left by previous decorators.
  2. ✨ 320 grit — fine. This is your final grit before painting on every surface in this guide. It creates the fine, even key the paint grips onto.
  3. 🧽 A sanding sponge — flexible. It follows profiled, moulded and turned surfaces such as architrave detail and staircase spindles where flat paper simply bridges the shape.
  4. ➡️ Always sand in the direction of the grain. Cross-grain scratches will telegraph through both coats and cannot be hidden later.
  5. 😷 Wear a dust mask and open a window. Old paint layers may be lead-based in properties built before 1970 — if in doubt, do not dry sand.

🔁 Never jump straight from 120 grit to paint. The scratch pattern is far too coarse and will show through the finish.

📦 Fold a full sheet into three and refold as it clogs — you get three fresh faces from one piece.

Products used:Sandpaper 120 GritSandpaper 320 GritSanding Sponge
  1. 🌀 Stir for 1–2 minutes with a drill and mixing paddle on a slow speed, or for 2–3 minutes by hand with a stirring stick.
  2. ⬇️ Work the paddle right to the bottom of the tin and around the edges — pigment and matting agents settle there and cause patchy sheen if left.
  3. 🚫 Never shake a tin of water-based trim paint. Shaking whips in air bubbles that burst on the surface and leave pinholes in the dried film.
  4. 🔄 Re-stir between coats and again if the tin has stood for more than an hour while you were preparing.
  5. 🫗 Decant what you need into a paint kettle rather than working from the tin, so brush dust and grit never contaminate the main supply.

💬 "Preparation is everything. The paint is the easy part."

🎯 If you are using more than one tin of the same colour, box them — pour all tins into one large container and stir together for a guaranteed consistent colour.

Products used:Drill Mixing PaddleTrim & Woodwork Paint

Skirting Boards

  1. 🔍 Run your hand and eye along the whole run first and mark the problem areas — flaking edges, crazed patches and thick brush-mark ridges.
  2. 🪵 Sand those areas with 120 grit until the failing paint is removed and the surface is level with the sound paint around it.
  3. 📏 Feather the edges of each repair so there is no hard step between bare timber and existing paint — a step will show clearly through the finish.
  4. 🧹 Vacuum the debris as you go rather than sweeping it, which just redistributes the dust onto surfaces you are about to paint.
  5. ⏭️ If the existing paintwork is sound and smooth, skip this step entirely and go straight to keying with 320 grit.

⚠️ Properties built before 1970 may have lead paint under later layers. Do not dry sand — test first and use a wet-sanding or chemical method if positive.

🧱 Our Trim & Woodwork paint is self-priming, so bare patches exposed by stripping need no separate primer; spot-prime them with a thin coat of the paint itself so they don't show through the finish.

🪵 Seal any bare knots in pine or softwood with knotting solution before painting, so resin cannot bleed through and stain the finish.

Products used:Sandpaper 120 Grit
  1. ✨ Sand the entire board with 320 grit in the direction of the grain — the whole face, the top edge and any moulded detail.
  2. 🧽 Switch to a sanding sponge on the moulded profile at the top of the board, where flat paper only touches the high points.
  3. 👋 You are not removing the old finish, only dulling it. When the surface looks uniformly matt with no shiny patches left, you are done.
  4. 🦵 Work in metre-long sections and check each one by eye at a low angle before moving on — glossy patches are missed key and will cause peeling.
  5. 🚪 Do not forget the returns at door openings and the short lengths behind radiators, which are the areas most often skipped.

🪞 Any remaining sheen is a place the paint can lift from later. Two extra minutes here saves a repaint in a year.

💡 Hold a torch parallel to the surface to reveal shiny spots your eye misses under normal room light.

Products used:Sandpaper 320 GritSanding Sponge
  1. 🧽 Wipe the board down with a slightly damp microfibre cloth — always microfibre, as cotton rags and kitchen roll leave lint behind in the finish.
  2. 💧 Damp, not wet. The cloth should lift dust without leaving water sitting on the timber or soaking into filler repairs later.
  3. ⬇️ Work top to bottom so dust falls onto surfaces you have not yet cleaned, and finish with the very bottom edge where dust collects.
  4. ♻️ Rinse and wring the cloth out regularly. A saturated cloth just spreads a grey film of paint dust along the board.
  5. ⏳ Let the surface dry completely — around 10 minutes in a ventilated room — before you fill or paint.

🌬️ Vacuum the floor along the skirting line as well. Dust on the floor gets kicked up and lands in your wet paint.

🚫 Avoid tack cloths with a waxy feel on water-based systems — some leave a residue that causes cissing.

Products used:Microfibre Cloths (Pack of 3)
  1. 🩹 Press fine surface filler firmly into each dent, nail hole and split with a filling knife, working it in rather than skimming it over.
  2. ⬆️ Leave every repair slightly proud of the surrounding surface — all fillers shrink slightly as they dry, and a sunken repair means a second application.
  3. 📐 Scrape the excess off with the edge of the knife so you have less to sand back afterwards.
  4. 🕳️ Fill deep holes in two thin passes rather than one thick one. A thick plug dries slowly on the outside and stays soft in the middle.
  5. ⏳ Allow the filler to dry fully as directed — typically 30–60 minutes for fine surface filler, longer in cold or damp rooms.

🚫 Do not use filler on the gap where skirting meets the wall — that joint moves and rigid filler will crack. Use caulk instead.

🌡️ Filler dries far more slowly below 10°C. Warm the room before you start if you want to paint the same day.

Products used:Fine Surface Filler
  1. ✨ Sand each filled area back flush with 320 grit, keeping the paper flat so you level the repair rather than dishing it out.
  2. 👋 Check every repair by running your fingertips over it with your eyes closed — your hand detects a ridge long before your eye does.
  3. 🔁 If a repair has sunk below the surface, apply a second thin skim of filler and sand again once dry rather than accepting a hollow.
  4. 🧽 Feather the edge of each repair into the surrounding paint so there is no visible outline once painted.
  5. 💧 Wipe away all filler dust with a damp microfibre cloth and let the board dry.

💡 Filler dust is very fine and pale — inspect with a torch held at a low angle to be sure it has all gone.

🎨 Filled areas are more absorbent than the paint around them. Spot-priming large repairs with a thin coat of the paint itself (it is self-priming) stops flashing in the finish.

Products used:Sandpaper 320 GritMicrofibre Cloths (Pack of 3)
  1. 🔧 Cut the nozzle at 45° with a small opening — you can always enlarge it, but an oversized bead is messy and wastes material.
  2. 🩹 Run a thin, continuous bead along the gap where the skirting meets the wall, moving the gun steadily and keeping pressure even.
  3. 👆 Smooth the bead immediately with a damp finger or caulking tool, pressing it into the joint rather than dragging it along the surface.
  4. 🧽 Wipe the excess away straight away with a damp cloth — cured caulk smeared on the wall face is very difficult to remove and shows under paint.
  5. ⏳ Allow the caulk to dry as directed, typically 1–2 hours, before painting over it.

🩹 For a razor-sharp line: tape along the top of cured skirting, run a thin bead of clear paintable caulk where the tape meets the wall, smooth with a damp finger, paint the wall immediately while the caulk is wet, then peel the tape while the paint is still wet.

✅ Only ever use caulk marked paintable. Silicone sealant will reject paint completely.

Products used:Clear Paintable Decorator's Caulk
  1. 🛡️ Run premium painter's tape along the wall just above the top edge of the skirting, in long unbroken lengths rather than short overlapping pieces.
  2. 👆 Press the bottom edge of the tape down firmly with a filling knife or your thumbnail so paint cannot creep underneath.
  3. 📦 Slide a strip of cardboard or a masking shield under the bottom edge of the board to catch drips and keep paint off carpet and hard floors.
  4. 🧺 Lay a dust sheet along the full length of the run, tucked tight to the skirting rather than left loose to shuffle around underfoot.
  5. 🔌 Mask or remove socket faceplates and floor vents sitting close to the skirting line.

📅 Use fresh tape. Old tape loses adhesion, lifts at the edge and bleeds badly.

🕐 Do not leave tape on the wall for days. Remove it the same day wherever possible to avoid pulling wall paint off with it.

Products used:Premium Painter's Tape
  1. 🖌️ Load a good quality synthetic brush about a third of the way up the bristles and tap off the excess against the kettle rather than scraping it.
  2. 🎨 Cut in the top moulded edge first, then the face, then the bottom edge, always brushing along the length of the board.
  3. 🧻 On long flat runs, lay the paint on with a short pile microfibre roller and immediately lay it off with a light brush stroke along the grain for a uniform texture.
  4. 📏 Work in sections of roughly one metre and keep a wet edge — join into paint that is still wet, never into paint that has started to set.
  5. 👀 Check the bottom edge and any internal corners for pooled paint before moving on, and brush out any runs while they are still wet.

🎨 Paint skirting boards before the walls — trim paint is less porous, so any wall paint that lands on it wipes off easily.

📉 Two thin coats always beat one thick coat. A heavy first coat sags on vertical faces and takes far longer to harden.

Products used:Synthetic Brush SetShort Pile Microfibre RollerTrim & Woodwork Paint
  1. 🫰 Check it is ready before recoating: wait out the recommended recoat time first — 1–2 hours, longer if conditions are cool or damp — then tap the dried coat very lightly with a fingernail, gently enough not to dent the film. It should feel and sound firm and hard. If it feels soft and sounds dull, a bit like tapping a pencil rubber, give it longer.
  2. 🪶 Denib before the next coat: rub the dry coat very lightly with 320 grit to knock back raised grain and dust nibs, then wipe away the dust.
  3. ⏱️ Allow 1–2 hours between coats. Touch dry is around 30 minutes, but the film needs the extra time before it will take a second coat cleanly.
  4. 👆 Test in an inconspicuous spot with the back of a finger — the surface should feel dry and cool with no tack at all.
  5. 🌬️ Keep the room ventilated and reasonably warm. Cold, damp or unventilated rooms can double the recoat time.
  6. 🧼 Wrap your brush and roller in cling film or a sealed bag during the wait rather than washing them out and starting again wet.
  7. 🔍 Use the hour to inspect the first coat at a low angle and note any thin areas to concentrate on next time round.

⚠️ Recoating too early drags the first coat, leaves visible ridges and traps solvent in the film.

🚫 Do not sand between coats unless you have a nib or a run — the finish is better left undisturbed.

  1. 🌀 Re-stir the tin and decant fresh paint into a clean kettle before you begin.
  2. 🖌️ Apply the second full coat exactly as the first — top edge, face, bottom edge, always along the grain.
  3. 💨 Keep a wet edge and work steadily along the run without stopping halfway down a long board, which leaves a visible join.
  4. 👀 Look along the board at a low angle as you go, checking for holidays, thin patches and drips while the paint is still workable.
  5. 🚷 Keep pets, children and traffic out of the room until the coat is touch dry — dust and hair settle into wet trim paint immediately.

🌈 The second coat is where the colour and sheen even out. Resist the urge to overwork it once it starts to set.

🔦 Dark colours over pale ones occasionally need a third thin coat — check in daylight before deciding.

Products used:Synthetic Brush SetShort Pile Microfibre RollerTrim & Woodwork Paint
  1. 🛡️ Peel the tape back on itself at a shallow angle, slowly and steadily, while the second coat is still wet.
  2. ↔️ Pull away from the painted edge rather than straight up, which tears the paint film and leaves a ragged line.
  3. 🔪 If any paint has bridged onto the tape and started to skin, score the line lightly with a sharp blade before peeling.
  4. 📦 Remove the cardboard from beneath the bottom edge before it sticks to the drying paint.
  5. 🖌️ Touch up any small bleeds immediately with a fine brush while everything is still wet.

⏰ Leave tape until the paint is fully dry and it will lift flakes of your new finish with it.

🧺 Bin used tape straight away rather than dropping it — wet tape sticks to floors and dust sheets and gets walked through the house.

Door Frames and Architraves

  1. 🔍 Inspect the frame closely — the leading edge and the strike plate area take the most knocks and usually carry the thickest build-up.
  2. 🪵 Sand those areas back with 120 grit until the failing layers are gone and the surface is level.
  3. 🕯️ Pay attention to mouldings that have been clogged by successive repaints; recovering the crisp profile makes an enormous visual difference.
  4. 📏 Feather every stripped edge so there is no step between bare and painted areas.
  5. ⏭️ Sound, smooth existing paintwork does not need stripping — move straight on to keying.

⚠️ Test for lead paint in pre-1970 properties before dry sanding any door frame.

🚪 Check the frame still closes freely once thick paint is removed — you may gain a couple of millimetres of clearance.

Products used:Sandpaper 120 Grit
  1. ✨ Sand the full frame and architrave with 320 grit — both uprights, the head, the door stop and the full architrave surround.
  2. 🧽 Use a sanding sponge on the moulded architrave profile so the abrasive follows the shape into the quirks and coves.
  3. 🚪 Do not forget the inside faces of the frame and the rebate where the door closes — these are always visible when the door is open.
  4. 👋 Work until every surface is uniformly dull with no glossy patches remaining.
  5. 🔩 Sand right up to hinges and the strike plate, or unscrew them if you want a truly clean job.

💡 Check with a torch held parallel to the surface — sheen is much easier to spot in raking light.

🎯 Fine detail sanded properly is what separates a professional-looking frame from a DIY one.

Products used:Sandpaper 320 GritSanding Sponge
  1. 🧽 Wipe the whole frame and architrave down with a slightly damp microfibre cloth, working from the head downwards.
  2. 🕳️ Pay particular attention to the mitre joints and the corners of mouldings, where sanding dust packs in and stays.
  3. 💧 Keep the cloth damp rather than wet and rinse it regularly so you are lifting dust rather than smearing it.
  4. 🔩 Wipe the hinges and strike plate too — dust sitting on hardware will migrate into your wet paint.
  5. ⏳ Allow the frame to dry fully before filling, usually around 10 minutes.

🌬️ Vacuum the floor at the threshold as well; doorways are the dustiest part of any room.

🚫 Never use a household spray cleaner — the residue will interfere with paint adhesion.

Products used:Microfibre Cloths (Pack of 3)
  1. 🩹 Press fine surface filler into every dent, screw hole and chip with a filling knife, leaving each repair slightly proud.
  2. 📐 Fill open mitre joints at the corners of the architrave — these are the first thing the eye notices on a finished frame.
  3. 🕳️ Deep damage around old lock or latch positions is better filled in two thin passes than one thick plug.
  4. 🚪 Fill the gaps around the strike plate and hinge recesses if the hardware has moved over time.
  5. ⏳ Allow the filler to dry fully as directed before sanding.

🧴 Use caulk, not filler, where the outer edge of the architrave meets the wall — that joint flexes.

🌡️ A cold hallway slows drying considerably. Warm the space if you want to finish the frame in a day.

Products used:Fine Surface Filler
  1. ✨ Sand each repair flush with 320 grit, keeping the abrasive flat and working along the length of the member.
  2. 🧽 Use a folded sheet or sanding sponge in the mitre corners so you do not round off the crisp arris of the moulding.
  3. 👋 Run your fingers over every repair — if you can feel it now, you will see it under paint.
  4. 🔁 Re-fill and re-sand anything that has sunk rather than leaving a hollow.
  5. 💧 Wipe away all dust with a damp microfibre cloth and let the frame dry.

🎨 Spot-prime large filled areas with a thin coat of the paint itself so they do not flash a different sheen through the topcoat.

💡 Inspect with a torch at a low angle before you accept the surface as finished.

Products used:Sandpaper 320 GritMicrofibre Cloths (Pack of 3)
  1. 🛡️ Run premium painter's tape along the wall side of the architrave in long continuous lengths up each leg and across the head.
  2. 👆 Press the inner edge down firmly with a filling knife so the paint cannot bleed under it.
  3. 📐 Butt the tape neatly at the corners rather than overlapping heavily, which creates a thick edge paint can pool against.
  4. 🔩 Mask hinges, the strike plate and any door furniture you have not removed.
  5. 🧺 Lay a dust sheet across the threshold on both sides of the doorway.

📅 Fresh tape only — old tape bleeds and tears.

🕐 Plan to remove the tape the same day to avoid lifting the wall finish.

Products used:Premium Painter's Tape
  1. 🖌️ Start at the top and work down, so any drips fall onto surfaces you have yet to paint.
  2. 🎨 Cut in all mouldings, quirks and profiles with a synthetic brush, working the paint into the detail rather than flooding it.
  3. 🧻 Lay off the flat faces of the frame and architrave with a short pile microfibre roller for an even, brush-mark-free texture.
  4. 🚪 Do not miss the rebate and door stop — they are fully visible whenever the door is open.
  5. 👀 Watch for paint building up in the corners of mouldings and brush it out before it sets into a bead.

📉 Thin coats. Heavy paint in a moulding profile will sag into a run within minutes.

🚪 Wedge the door open and out of the way, or take it off its hinges, so you are not working around a swinging obstacle.

Products used:Synthetic Brush SetShort Pile Microfibre RollerTrim & Woodwork Paint
  1. 🫰 Check it is ready before recoating: wait out the recommended recoat time first — 1–2 hours, longer if conditions are cool or damp — then tap the dried coat very lightly with a fingernail, gently enough not to dent the film. It should feel and sound firm and hard. If it feels soft and sounds dull, a bit like tapping a pencil rubber, give it longer.
  2. 🪶 Denib before the next coat: rub the dry coat very lightly with 320 grit to knock back raised grain and dust nibs, then wipe away the dust.
  3. ⏱️ Allow a full hour before applying the second coat.
  4. 👆 Check the film is dry and completely free of tack before you recoat, especially inside mouldings where paint sits thickest.
  5. 🌬️ Keep the doorway ventilated but avoid strong draughts blowing dust and grit onto the wet frame.
  6. 🚪 Keep the door open and out of contact with the frame throughout the wait.
  7. 🖌️ Bag your brush and roller rather than washing them out between coats.

⚠️ Recoating a tacky frame will drag and roll the first coat off the moulding edges.

🌡️ Cold hallways and unheated landings will need longer than an hour.

  1. 🌀 Re-stir the paint and decant fresh into a clean kettle.
  2. 🖌️ Apply the second full coat in the same order — top down, profiles first, flat faces laid off last.
  3. 💨 Keep the work moving and maintain a wet edge along each leg of the frame so there are no visible joins.
  4. 👀 Inspect for thin spots at the arrises and moulding high points, which always cover last.
  5. 🛡️ Peel the tape slowly at a shallow angle while the paint is still wet.

✋ Once the coat starts to set, stop touching it. Overworking half-set trim paint leaves permanent brush marks.

🔦 Check the finish in daylight as well as under artificial light before deciding whether a third coat is needed.

Products used:Synthetic Brush SetShort Pile Microfibre RollerTrim & Woodwork Paint
  1. 🚪 If you are also painting the door, allow the frame at least 24 hours to cure before you start on the door itself.
  2. 🪵 Keep the door wedged open and clear of the frame for the whole curing period so the two surfaces cannot touch.
  3. 🔒 Do not latch the door shut — freshly cured paint on a rebate will bond to the door edge and tear when opened.
  4. 🧽 Give the frame a light wipe with a dry microfibre cloth before painting the door to remove any settled dust.
  5. 📅 Remember the full cure is 7 days even though the surface is hard enough for careful use after 24 hours.

⚠️ Paint the door first and you risk dragging wet door paint onto freshly painted frames every time it swings.

🧴 A light dusting of talc on a cured rebate prevents any residual tack sticking in humid weather.

Window Sills

  1. 🔍 Check the sill carefully, especially the front edge and the corners against the frame where condensation collects and paint lifts first.
  2. 🪵 Sand back with 120 grit until every loose or flaking layer is gone and the surface is sound and level.
  3. 💧 Look for soft or blackened timber as you strip — water damage must be dealt with before painting, not covered over.
  4. 📏 Feather the edges of the stripped areas so there is no step to show through the finish.
  5. 🧹 Vacuum the debris from the sill and the frame runners as you go.

⚠️ Old window paint is a common location for lead. Test before dry sanding in a pre-1970 property.

🌤️ Choose a dry day and open the window while you work — sills need low humidity to dry properly.

Products used:Sandpaper 120 Grit
  1. ✨ Sand the whole sill firmly with 320 grit in the direction of the grain until it feels completely smooth to the hand.
  2. 🖐️ Horizontal surfaces catch raking daylight all day long, so every scratch and ridge shows far more than it would on skirting.
  3. 📐 Sand the front nose and the underside return as well — both are highly visible from inside the room.
  4. 🧽 Use a sanding sponge on any moulded nosing so the abrasive follows the profile.
  5. 👋 Finish by checking the whole surface with your palm; it should feel uniformly silky with no dull patches or shine.

💡 Sight along the sill towards the window light to reveal high spots and remaining sheen.

🎯 Time spent here is repaid directly — nothing shows a poor prep job like a window sill.

Products used:Sandpaper 320 Grit
  1. 🧽 Wipe the sill, nosing and underside down with a slightly damp microfibre cloth.
  2. 🕳️ Clear dust out of the corners where the sill meets the frame using a folded corner of the cloth.
  3. 🪟 Wipe the bottom of the glass and the frame rebate too, so dust does not fall back onto the sill later.
  4. ♻️ Rinse the cloth frequently — sills carry more grime and dust than any other trim surface.
  5. ⏳ Allow the sill to dry completely before filling; trapped moisture will stop filler bonding.

🧴 If the sill is greasy or has sat under condensation, clean it with sugar soap first and rinse thoroughly.

🌬️ Leave the window open a crack while it dries if the weather allows.

Products used:Microfibre Cloths (Pack of 3)
  1. 🩹 Press fine surface filler into every crack, dent and area of open grain, leaving each repair slightly proud.
  2. 📐 Pay attention to the front edge, which takes the most knocks, and to any splits running with the grain.
  3. 🕳️ Fill deeper defects in two thin passes rather than one thick application.
  4. 🔩 Fill old screw holes from previous fittings or window locks if you are not reusing them.
  5. ⏳ Allow the filler to dry fully — a horizontal surface holds moisture longer, so give it extra time.

💧 If the timber is spongy rather than simply damaged, it needs replacing or a resin repair — filler will not hold.

🌡️ Cold, damp window reveals slow drying dramatically. Be patient rather than painting over soft filler.

Products used:Fine Surface Filler
  1. ✨ Sand every repair flush with 320 grit, keeping the paper flat so the sill stays perfectly level.
  2. 👋 Test with your fingertips across the whole surface — horizontal surfaces betray the smallest ridge in daylight.
  3. 🔁 Skim and re-sand any repair that has shrunk below the surface.
  4. 📐 Re-establish the crisp front arris of the sill rather than rounding it off with the abrasive.
  5. 💧 Remove all dust with a damp microfibre cloth and let it dry.

🎨 Spot-prime larger repairs with a thin coat of the paint itself so they do not flash through the finish.

💡 Use the daylight from the window itself as your raking light to check the surface.

Products used:Sandpaper 320 GritMicrofibre Cloths (Pack of 3)
  1. 🔧 Cut the caulk nozzle small at 45° so you can lay a fine, controlled bead.
  2. 🩹 Run a bead along the join between the sill and the wall, and along the join between the sill and the window frame.
  3. 👆 Smooth each bead immediately with a damp finger, pressing it into the joint rather than smearing it across the faces.
  4. 🧽 Wipe away all excess with a damp cloth before it starts to skin.
  5. ⏳ Allow the caulk to dry as directed before painting, typically 1–2 hours.

✅ Use only paintable caulk — silicone will reject the paint entirely.

💧 Sealing these joints properly also stops condensation running into the wall below.

Products used:Clear Paintable Decorator's Caulk
  1. 🛡️ Apply premium painter's tape along the very edge of the glass in long, unbroken lengths.
  2. 👆 Press the inner edge down firmly with a filling knife so the line is sealed and cannot bleed.
  3. 📐 Leave a hairline of the putty line or rebate exposed so the paint seals onto the glass edge, which keeps water out.
  4. 🧺 Mask or cover any window furniture, handles and stays you are not removing.
  5. 📦 Protect the floor or radiator beneath the sill with a dust sheet.

🪟 Any paint that reaches the glass can be removed once fully dry with a window scraper held at a shallow angle.

🕐 Do not leave tape on glass in direct sunlight for days — heat bakes the adhesive on.

Products used:Premium Painter's Tape
  1. 🖌️ Apply a thin first coat with a synthetic brush, working along the length of the sill in the direction of the grain.
  2. 🧻 On wide, flat sills lay the paint on with a short pile microfibre roller, then lay off lightly with the brush for an even texture.
  3. 📐 Paint the front nose and the underside return as well as the top face.
  4. 👀 Watch for paint pooling in the corners against the frame and brush it out immediately.
  5. 💨 Work steadily from one end to the other, keeping a wet edge throughout.

☀️ Avoid painting a sill in direct hot sunlight — the surface skins before the paint can level.

📉 Thin coats level far better on a horizontal surface than heavy ones, which pool and wrinkle.

Products used:Synthetic Brush SetShort Pile Microfibre RollerTrim & Woodwork Paint
  1. 🫰 Check it is ready before recoating: wait out the recommended recoat time first — 1–2 hours, longer if conditions are cool or damp — then tap the dried coat very lightly with a fingernail, gently enough not to dent the film. It should feel and sound firm and hard. If it feels soft and sounds dull, a bit like tapping a pencil rubber, give it longer.
  2. 🪶 Denib before the next coat: rub the dry coat very lightly with 320 grit to knock back raised grain and dust nibs, then wipe away the dust.
  3. ⏱️ Allow a full hour before the second coat.
  4. 👆 Confirm the film is dry and free of tack before recoating — horizontal surfaces hold solvent slightly longer.
  5. 🪟 Keep the window open a little for ventilation, but not so wide that the sill collects airborne dust and pollen.
  6. 🚫 Do not close and latch the window against a freshly painted sill during the wait.
  7. 🖌️ Wrap your brush and roller rather than washing them out mid-job.

🌫️ High humidity around windows extends drying times noticeably — allow longer on damp days.

🐝 Keep the window closed if insects are about; they land in wet paint on sills more than anywhere else.

  1. 🌀 Re-stir the paint and decant fresh before starting.
  2. 🖌️ Apply the second full coat the same way — top face, front nose and underside return.
  3. 💨 Keep a wet edge and work along the sill in one pass rather than stopping and restarting in the middle.
  4. 👀 Check the finish in raking daylight for thin patches before the paint sets.
  5. 🛡️ Peel the masking tape from the glass slowly, at a shallow angle, while the paint is still wet.

✨ Choose specialist Trim & Woodwork Paint in Satin for a smooth lustre on sills, or Matt for a quieter look. Allow full curing before placing objects on the surface.

🪴 Keep plant pots and ornaments off the sill for the full 7 day cure or they will mark the fresh film.

Products used:Synthetic Brush SetShort Pile Microfibre RollerTrim & Woodwork Paint

Bannisters, Spindles and Newel Posts

  1. 🧺 Lay a drop cloth over the treads and any carpet, working it into the back of each tread rather than leaving it loose.
  2. 📦 Line the gap between the cloth and the string board with cardboard so drips cannot run down into the carpet edge.
  3. 🛡️ Tape everything down firmly — a shifting dust sheet on a staircase is a genuine trip hazard as well as a mess risk.
  4. 💡 Set up good lighting. Staircases are usually the worst-lit space in the house and you cannot paint what you cannot see.
  5. 🚷 Plan your access and route so you are never painting yourself into a corner or reaching across wet spindles.

🪜 Use a proper stair ladder or platform rather than balancing on treads.

🕐 Warn the household — a staircase out of action for a few hours needs planning.

Products used:Premium Painter's Tape
  1. 🧴 Dilute sugar soap according to the label, typically one part to five parts warm water.
  2. 🧼 Wash the handrail first and most thoroughly — years of hand oils are concentrated there and will stop paint adhering.
  3. 🧽 Work the solution into the turned profiles of the spindles with a cloth or flat scouring pad, not just over the high points.
  4. 🏛️ Clean the newel posts and caps as well, including the underside of the handrail where hands wrap around it.
  5. 🔄 Work in sections and keep the surface wet with solution rather than letting it dry on.

⚠️ Skipping this step is the single most common reason painted bannisters peel within months.

🧤 Wear gloves — sugar soap is alkaline and dries the skin badly.

Products used:Sugar Soap Concentrate
  1. 🧽 Rinse every surface with a clean wet microfibre cloth, changing the water regularly.
  2. 🔁 Go over the handrail twice — residue left there will show as patchy adhesion later.
  3. 💧 Wring the cloth well so you are not soaking the timber, particularly at joints and end grain.
  4. 🌬️ Allow the staircase to dry fully before sanding; sanding damp timber clogs the abrasive and raises the grain.
  5. 👋 Check by hand — the surface should feel completely dry and slightly squeaky, not slick.

⏳ Allow longer than you expect in an unheated hallway; 30 minutes is a minimum, not a rule.

🚪 Open a window or run a fan to speed drying without blowing dust around.

Products used:Microfibre Cloths (Pack of 3)
  1. 🔍 Check the handrail and the base of each spindle first — these are where old finishes fail soonest.
  2. 🪵 Sand back with 120 grit until the surface is sound and the failing layers are gone.
  3. 📏 Feather the edges of every stripped area so the repair does not telegraph through the finish.
  4. 🕯️ Recover clogged detail on turned spindles where thick paint has filled the beads and coves.
  5. 🧹 Vacuum thoroughly — staircase dust falls through to the treads below and gets walked through the house.

⚠️ Staircases in older houses very often carry lead paint. Test before dry sanding.

⏭️ Sound, smooth paintwork does not need stripping — go straight to the 320 grit key.

Products used:Sandpaper 120 Grit
  1. 🧽 Sand the handrail, every spindle and both newel posts with 320 grit until all surfaces are uniformly dull.
  2. 🌀 Use a sanding sponge on turned and profiled sections so the abrasive follows the shape into the beads and hollows.
  3. 📄 Fold a piece of paper into a narrow strip for tight areas where the spindle meets the handrail and the string board.
  4. 🤲 The handrail deserves the most attention — it is gripped constantly and any missed sheen there will fail first.
  5. 🔍 Work spindle by spindle and check each one all the way round before moving on; it is very easy to miss the back face.

⏱️ This is the longest step in the section. Budget the time properly rather than rushing it.

💡 A head torch is genuinely useful on a dim staircase for spotting missed sheen.

Products used:Sandpaper 320 GritSanding Sponge
  1. 🧽 Wipe every surface down with a slightly damp microfibre cloth, working from the top of the staircase downwards.
  2. 🌀 Wrap the cloth around each spindle and draw it down the full length to catch dust sitting in the profiles.
  3. 🏛️ Clean the newel caps and the underside of the handrail, both of which collect dust and are easy to forget.
  4. ♻️ Rinse the cloth frequently so you lift dust rather than smear it into a grey film.
  5. 🧹 Vacuum the treads and drop cloth afterwards, then allow everything to dry.

🌬️ Let the airborne dust settle for 15 minutes before you start painting, or it will land in the wet film.

🚫 Skip household sprays — residue causes adhesion problems on exactly the surfaces you can least afford to fail.

Products used:Microfibre Cloths (Pack of 3)
  1. ✅ Our Trim & Woodwork paint is self-priming, so sound, previously painted bannisters that have been cleaned and keyed need no separate primer.
  2. 🧪 If the finish is varnish, lacquer or oil-based paint, key it thoroughly with 320 grit, then paint a small test patch somewhere hidden, such as the back of a newel post, and leave it overnight.
  3. 💅 Drag a fingernail lightly across the dried patch. If it holds firmly, carry on. If it scratches or lifts away, the old finish needs an isolating primer before you paint.
  4. ✨ A primer is also an option on bare or newly exposed timber if you want the very finest finish, but it is not required.

🔍 Not sure what the old finish is? Treat it as varnish and do the test patch. It costs one evening and saves redoing the whole staircase.

Products used:Isolating Primer
  1. ⬇️ For a single colour, work handrail first, spindles second and newel posts last, so any drips fall onto surfaces still to be painted.
  2. 🎨 For a two-tone staircase, paint the spindles first and let them cure fully before masking and painting the handrail.
  3. 🚶 Plan your route so you finish at the bottom of the stairs and are never trapped above wet paintwork.
  4. 🔢 Count your spindles and work in runs of five or six, completing each run fully before moving on.
  5. 🕐 Decide when the staircase can realistically be out of use and work backwards from there.

🏠 If the staircase is the only route upstairs, do half the width at a time and leave one side usable.

📝 Note where you stopped if you break — it is surprisingly hard to see which spindle you last completed.

  1. 🖌️ Use a small synthetic brush for spindle profiles and a larger one, or a short pile roller, on the flat runs of handrail.
  2. 🌀 Paint each spindle all the way round in one go, following the turned profile rather than brushing straight down the length.
  3. 💧 Watch for paint collecting in the coves and at the base of each spindle and brush it out before it sets into a run.
  4. 🤲 Lay the handrail off in long, continuous strokes along its length for a smooth, comfortable finish under the hand.
  5. 👀 Check the underside of the handrail and the back of every spindle before moving on — both are missed constantly.

📉 Thin coats. Turned profiles collect and hold paint, and runs on spindles are very obvious.

🪜 Reposition your ladder rather than over-reaching; a rushed stretch is how drips happen.

Products used:Synthetic Brush SetShort Pile Microfibre RollerTrim & Woodwork Paint
  1. 🫰 Check it is ready before recoating: wait out the recommended recoat time first — 1–2 hours, longer if conditions are cool or damp — then tap the dried coat very lightly with a fingernail, gently enough not to dent the film. It should feel and sound firm and hard. If it feels soft and sounds dull, a bit like tapping a pencil rubber, give it longer.
  2. 🪶 Denib before the next coat: rub the dry coat very lightly with 320 grit to knock back raised grain and dust nibs, then wipe away the dust.
  3. ⏱️ Allow 1–2 hours between coats before you start the second.
  4. 🚷 Keep the staircase out of use — one hand on a tacky handrail undoes the whole job.
  5. 👆 Check the film for tack in the coves of the spindles, where paint sits thickest and dries slowest.
  6. 🌬️ Ventilate the hallway to help the coat dry, without creating a dusty draught.
  7. 🖌️ Wrap brushes and rollers rather than washing them out mid-job.

🪧 Put a note or a chair at the bottom of the stairs so nobody forgets.

🌡️ Cold, unheated hallways will need longer than an hour.

  1. 🌀 Re-stir the tin and decant fresh paint before you start.
  2. 🖌️ Apply the second full coat in exactly the same order as the first — handrail, spindles, newel posts.
  3. 🔍 Check underneath the handrail and between the spindles for missed areas from the first coat and cover them properly now.
  4. 💨 Keep a wet edge along the handrail and finish each run without stopping halfway.
  5. 👀 Do a final walk down the stairs looking up at the underside of everything before the paint sets.

🤲 Bannisters are gripped and leaned on constantly. Use specialist Trim & Woodwork Paint in Matt or Satin, prepare thoroughly and allow full curing.

✋ Do not overwork half-set paint on a handrail — the brush marks will stay.

Products used:Synthetic Brush SetShort Pile Microfibre RollerTrim & Woodwork Paint
  1. ⏳ Wait until the spindles are fully dry and hard — at least 24 hours — before taping anything to them.
  2. 🛡️ Mask carefully at the top of each spindle where it meets the handrail, pressing the tape edge down firmly all the way round.
  3. 📐 Take your time on the mask. On a two-tone staircase the tape line is the detail everyone looks at.
  4. 🖌️ Paint the handrail and newel posts in your second colour, working top to bottom in two thin coats an hour apart.
  5. 🛡️ Peel the tape back at a shallow angle while the final coat is still wet, then touch up any bleed with a fine brush.

✨ Spindles in Satin have a smooth lustre; Matt gives a more restrained look.

🎨 A dark handrail against pale spindles is the classic combination and hides hand wear far better.

Products used:Premium Painter's TapeSynthetic Brush SetTrim & Woodwork Paint

Final Checks and Curing

  1. 🔍 Once both coats are dry, look along each surface at a low angle in good natural daylight rather than under artificial light.
  2. 💡 Use a torch held almost parallel to the surface to reveal thin spots, missed areas and nibs of dust in the film.
  3. 📐 Check the areas that are always missed: the underside of handrails and sills, the backs of spindles, the frame rebate and skirting returns.
  4. 💧 Look for drips and runs at bottom edges and in moulding profiles, which set into hard beads if left.
  5. 📝 Note everything that needs attention before you start touching up, so you only go round once.

🌅 Inspect in the morning and again in the evening — different light angles reveal different faults.

🚫 Do not sand a run that is only a few hours old; it will clog and tear. Wait until it is hard.

  1. 🌀 Stir the tin thoroughly before touching up. Unstirred paint dries a different sheen and every touch-up will show.
  2. 🖌️ Use a small synthetic brush and feather each touch-up out into the surrounding paint rather than dabbing a hard-edged patch.
  3. ✨ Cut hardened nibs or runs back with 320 grit first, wipe the dust away, then touch up over the levelled area.
  4. 📏 Where a whole face is patchy, it is better to recoat the full length than to spot in several repairs.
  5. 👀 Check the touch-ups again once dry, in the same raking light you used for the inspection.

🥫 Keep a small labelled jar of each colour for future touch-ups; staircases and skirting need them eventually.

☀️ Touch up in the same light conditions you inspected in, or you will chase faults that are not there.

Products used:Synthetic Brush SetTrim & Woodwork Paint
  1. ⏳ Leave all painted woodwork untouched for at least 24 hours before any light use.
  2. 🚪 Keep doors wedged open and unlatched so freshly painted frames and door edges cannot bond together.
  3. 🤲 Avoid gripping handrails and leaning on newel posts during this period; the film marks very easily.
  4. 🪴 Keep objects off sills and away from skirting — anything resting on soft paint will leave a permanent impression.
  5. 🌬️ Keep the rooms ventilated and reasonably warm to help the film harden evenly.

🐕 Keep pets away from freshly painted skirting and staircases for the full 24 hours.

🧺 Leave dust sheets down until the surfaces are hard enough to survive being knocked.

  1. 📅 Allow the full 7 day cure before washing woodwork or subjecting it to everyday wear and tear.
  2. 💪 The paint reaches its final hardness and washability at the end of the cure, not when it feels dry to the touch.
  3. 🧽 After 7 days, clean with a soft cloth and warm soapy water only — never abrasive creams or scouring pads.
  4. 🧴 Avoid solvent cleaners and bleach on painted woodwork, which will dull the sheen permanently.
  5. 🔧 Refit any hardware, door furniture or window locks you removed once the cure period is complete.

🌡️ Cold or damp conditions extend the cure. In an unheated hallway, allow longer than 7 days before washing.

📸 Photograph the finished work and note the colour and finish for future reference and touch-ups.

The paint

Scuff Resistant
Self-Levelling
Waterbased
Ultra-low VOC
Touch dry30 mins
Recoat time1–2 hours
Full adhesion7 days
Key and denib with320 grit
Brush withSynthetic
Roll withMohair mini

What paint should I use on trim and woodwork?

Our Trim & Woodwork paint is formulated for interior joinery — skirting boards, door frames, architraves, window sills, bannisters, spindles and newel posts. It is available across our full palette in matt and satin. Wall paint is not designed for joinery and will not stand up to the knocks, touches and cleaning that woodwork takes every day.

Which finish is best for woodwork?

Our specialist Trim & Woodwork Paint launches in Matt and Satin. Matt gives a restrained, low-sheen look; Satin gives a smooth lustre. Both are Class 1 scrubbable. Gloss is not part of the launch range. Prepare the surface correctly and allow full curing before cleaning or heavy use.

Why does preparation matter more on woodwork than walls?

Woodwork takes far more punishment than walls. It gets knocked, touched, cleaned and leaned on constantly. That means the key needs to be right, the surface needs to be clean and free of lint and dust, and the finish needs to be chosen for the wear the surface will take. Preparation is the difference between a finish that lasts and one that fails within a year.

Which sandpaper grit should I use on woodwork?

120 grit for removing old, failing or heavily built-up paint finishes. 320 grit as the final grit before painting — it gives a smooth, fine key without over-abrading the surface. Always finish with 320 grit before applying paint. A sanding sponge is essential for any profiled, moulded or turned surfaces. It flexes around the detail and removes without flattening it.

Do I need to stir the paint?

Yes. Stir the paint thoroughly before use — for 1–2 minutes with a drill and mixing paddle, or with a stirring stick. Paint can settle in storage and an unstirred tin will not give you the correct colour or consistency. Worse, the paint taken off the top of an unstirred tin is not representative of the full mix, so the remaining paint will be off going forward too.

How do I prepare skirting boards?

Sand with 320 grit as a final key before painting. If you are removing old or failing paint, start with 120 grit and finish with 320. Wipe down with a slightly damp microfibre cloth — always microfibre, as other cloths leave lint. Fill any dents or holes with fine surface filler. For gaps where the skirting meets the wall, use decorator's caulk rather than filler — caulk remains flexible and will not crack as the two surfaces move independently. Smooth with a damp finger, wipe away excess and allow to dry before painting.

Should I use filler or caulk where the skirting meets the wall?

Caulk. Filler is rigid and will crack along the join as the wall and the skirting move independently. Decorator's caulk stays flexible. Run a thin bead, smooth it with a slightly damp finger and wipe away all excess — you want a seamless seal, not a visible bead.

How do I protect the floor when painting skirting?

Mask up to the top of the skirting board with premium painter's tape, pressing the edges down firmly. For the floor, push a piece of cardboard under the bottom edge of the skirting to catch drips.

How do I get a crisp line between the skirting and the wall?

Use the caulk trick, once the skirting is fully cured: 1. Apply premium painter's tape along the top edge of the skirting and press down firmly. 2. Run a very thin bead of clear paintable decorator's caulk where the tape meets the wall. 3. Smooth with a damp finger and wipe away all excess. 4. Paint the wall immediately while the caulk is still wet. 5. Peel the tape carefully while the paint is still wet for a razor-sharp line.

Should I paint the skirting before or after the walls?

Paint skirting boards before the walls. Trim paint is less porous than wall paint, which means any wall paint that lands on the skirting can be wiped off easily with a damp cloth. See our walls and ceilings guide for the complete order of work.

How should I apply paint to skirting boards?

Apply two full coats using a good quality synthetic brush, or a short pile microfibre roller on flat sections. Work in the direction of the grain. Take care to avoid drips and runs — build coverage in thin, even coats rather than one heavy pass. Allow 1–2 hours between coats.

How do I prepare door frames and architraves?

Sand with 320 grit sandpaper to create a fine key before painting. If the existing paint is heavily built up, start with 120 grit to reduce the build-up before finishing with 320. Wipe down with a damp microfibre cloth. Fill any imperfections with fine surface filler, sand smooth once dry, and wipe down again.

Should I paint the door or the door frame first?

Paint the door frame and architrave first and allow to cure fully — at least 24 hours — before painting the door itself. This means any overlap from the door onto the frame can be covered cleanly when you paint the door. If you paint the door first, you risk dragging wet door paint onto freshly painted frames every time the door swings.

What tools should I use on architraves and mouldings?

Use a good quality synthetic brush for all architrave profiles and mouldings — synthetic bristles perform far better than natural bristle with water-based paint. A short pile microfibre roller works well on any flat sections. Apply two full coats, allowing 1–2 hours between coats.

Why do window sills need extra preparation?

Window sills are exposed to condensation, sunlight, temperature change and the constant placement of objects — plants, cups, candles. Sanding is particularly important. The surface needs to be as smooth as possible; any roughness will show clearly on a horizontal surface in natural light. Sand firmly, finishing with 320 grit working in the direction of the grain. If removing old or failing paint, begin with 120 grit. Wipe down with a damp microfibre cloth and allow to dry fully. Fill any cracks, dents or gaps with fine surface filler, and run a bead of decorator's caulk along any joins where the sill meets the wall or window frame.

Which finish is best for window sills?

Choose specialist Trim & Woodwork Paint in Satin for a smooth lustre or Matt for a quieter look. Both launch finishes are Class 1 scrubbable. Sills receive daily wear from objects and cleaning, so thorough preparation and full curing are particularly important.

How do I mask the glass when painting window frames?

Always mask the glass before painting window frames and sills. Apply premium painter's tape along the edge of the glass, pressing the inner edge down firmly. Any paint that gets onto the glass despite this can be removed once fully dry using a window scraper — hold it at a shallow angle and work carefully to avoid scratching the glass.

How do I protect the staircase before painting a bannister?

Lay a drop cloth on the stair carpet or treads, then line the gap between the drop cloth and the skirting or string board with cardboard to catch any drips. Tape everything down firmly.

How do I prepare bannisters and spindles?

Clean all surfaces thoroughly with a sugar soap solution and a cloth or flat scouring pad — particularly intricate spindle profiles where dust and grease accumulate in the crevices. Rinse with a clean wet microfibre cloth and allow to dry fully. Sand all surfaces, finishing with 320 grit. Use a sanding sponge on any turned, twisted or profiled spindles — it follows the contours without flattening the detail. For particularly intricate profiles, a small piece of sandpaper folded to a point can reach into tight areas. If removing old or failing paint, begin with 120 grit before finishing with 320.

Can I paint over varnished or oil-based woodwork?

Usually, with the right preparation. Our Trim & Woodwork paint is self-priming, so key the old finish thoroughly with 320 grit, clean off the dust and paint a small test patch somewhere hidden. Leave it overnight and drag a fingernail lightly across it. If the patch holds firmly, carry on. If it scratches or lifts away, the old finish needs an isolating primer first. Poor adhesion is particularly problematic on a surface as heavily used as a handrail, so the test is worth doing.

Which finish should I use on a bannister?

Bannisters and handrails are handled and rubbed constantly. Use specialist Trim & Woodwork Paint in Matt or Satin, clean and key the surface thoroughly, and allow the full cure period before heavy use. Satin has a smooth lustre; Matt gives a more restrained look.

What order should I paint a bannister in?

For a single colour, work from the top down: handrail first, spindles second, newel posts last. This follows the general decorating principle of working top to bottom, minimising the risk of dripping onto already-painted surfaces below.

How do I paint a two-tone bannister?

Two-tone balustrades — typically lighter spindles with a deeper or contrasting colour on the handrail and newel posts — look very effective. The order changes slightly: 1. Paint the spindles first in your chosen colour and allow to dry fully. 2. Mask carefully at the top of each spindle where it meets the handrail, using premium painter's tape pressed firmly into the join. 3. Paint the handrail and newel posts in your second colour. Peel the tape while the paint is still wet for the cleanest line. Masking between spindles and handrail is fiddly but worth the effort — the clean line between the two colours is what makes the look work.

What brush should I use on turned spindles?

Use a good quality synthetic brush throughout. A small brush is essential for getting paint into the profiles and crevices of turned spindles. A short pile microfibre roller can be used on flat sections of the handrail. Apply two full coats, allowing 1–2 hours between coats.

How many coats does woodwork need?

Two full coats, allowing 1–2 hours between coats. Two full coats applied correctly give you the true colour, the correct finish and maximum durability. If you are painting a light colour over a significantly darker one, a third coat may be needed — budget for this when ordering.

How long before I can use painted woodwork?

Leave painted woodwork for at least 24 hours before light use, and allow the full 7 day cure period before washing or subjecting it to everyday wear and tear. Bannisters and handrails receive more wear than almost any other painted surface in the home — allow the full 7 day cure before heavy daily use.

How do I clean painted woodwork?

All our paints achieve at least a Class 1 scrub rating, and Trim & Woodwork in satin is fully scrubbable and wipeable. For most marks, a slightly damp microfibre cloth is all that is needed. Soap and water is sufficient for more stubborn marks. Avoid chemical cleaners, abrasive cloths or scouring pads. Wait until the full 7 day cure period has passed before cleaning.

Will my colour match if I order more paint later?

Not guaranteed. Paint is made using naturally occurring raw materials that vary slightly from one production batch to the next. These shifts are small, but they can be visible when tins from different batches are used side by side. What we do guarantee is that every tin within a single order is made from the same batch of base and the same batches of colourant. Our firm recommendation: order 10% more than you need and keep the surplus sealed. Leftover paint from your original order is the only true match you will ever have for future touch-ups.